Secure your Terraform IaC with checkov
TL:DR; You can use checkov to scan your Terraform Iac for misconfigurations adding some level of DevSecOps. It can also be integrated with pre-commit. If you want, it can be applied to Bicep, Kubernetes or other supported frameworks.
Last time I wrote about getting started with pre-commit. This time I want to write a little more on how you can use checkov to do a compliance scan on your Terraform files. Furthermore to show how checkov can be used as a part of your pre-commit routine or CI/CD.
DevSecOps
Have you ever heard of DevSecOps? Either you have, or you haven’t, that’s not important for this post.
DevSecOps stands for development, security, and operations. It’s an approach to culture, automation, and platform design that integrates security as a shared responsibility throughout the entire IT lifecycle.
Using some sort of security analysis tool in the starting phase of your application/system lifecycle is part of what DevSecOps stands for. You can say that in the lifecycle, that starts on the left and ends on the right, you want to “shift security left”. This means focusing some of your effort on security from the start.
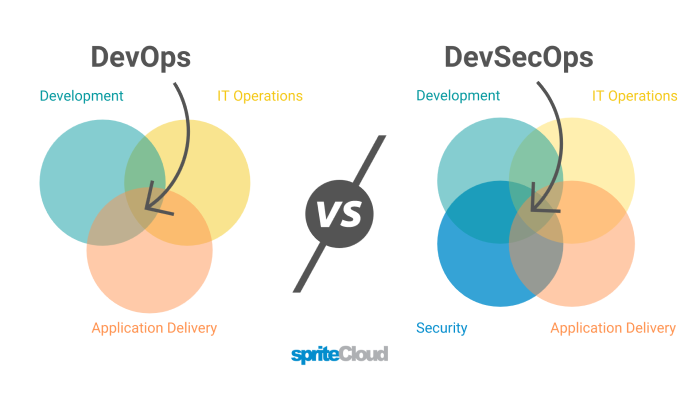
This image, loaned from Spritelab in the article I linked above, is a good visualization of the differences between DevOps and DevSecOps:
Security becomes a more important part of the entire lifecycle, and also important from the start.
You can use GitHub’s dependabot for scanning dependencies in your repositories. You can use Snyk to scan your app or IaC for vulnerabilities (and many other things). You can also use checkov to scan your infrastructure as code for misconfigurations, and here lies the focus of this post. All these tools, among many others, help you achieve a higher level of security, and shifting the security left in your lifecycle.
Installation
Checkov is easily installed with pip on Linux. I will be using this in my WSL2 configuration on Windows, and will not look more closely into if this could work natively in Windows.
I ran pip3 install -U checkov to install checkov, but I might have had it installed from before. If you are on Ubuntu 18.04, Python version can be an issue. I am using 20.04, and didn’t get that issue.
Analyze Terraform directory
You need some terraform files to analyse. Previously I wrote a post about running GitHub runners in AKS. This folder will be used for scanning going forward.
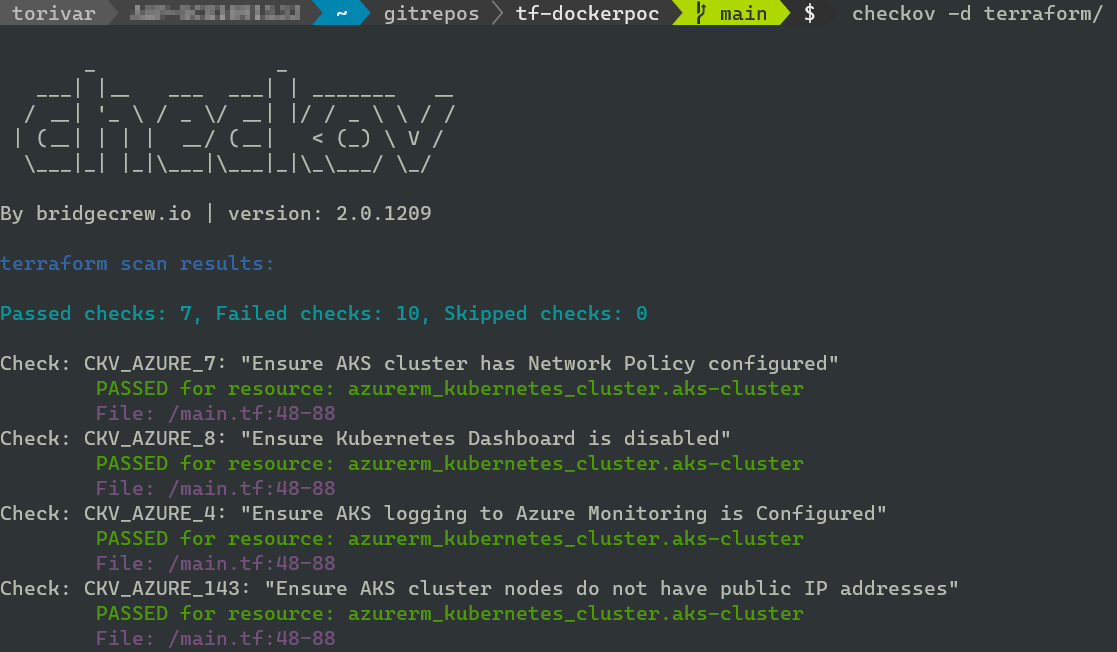
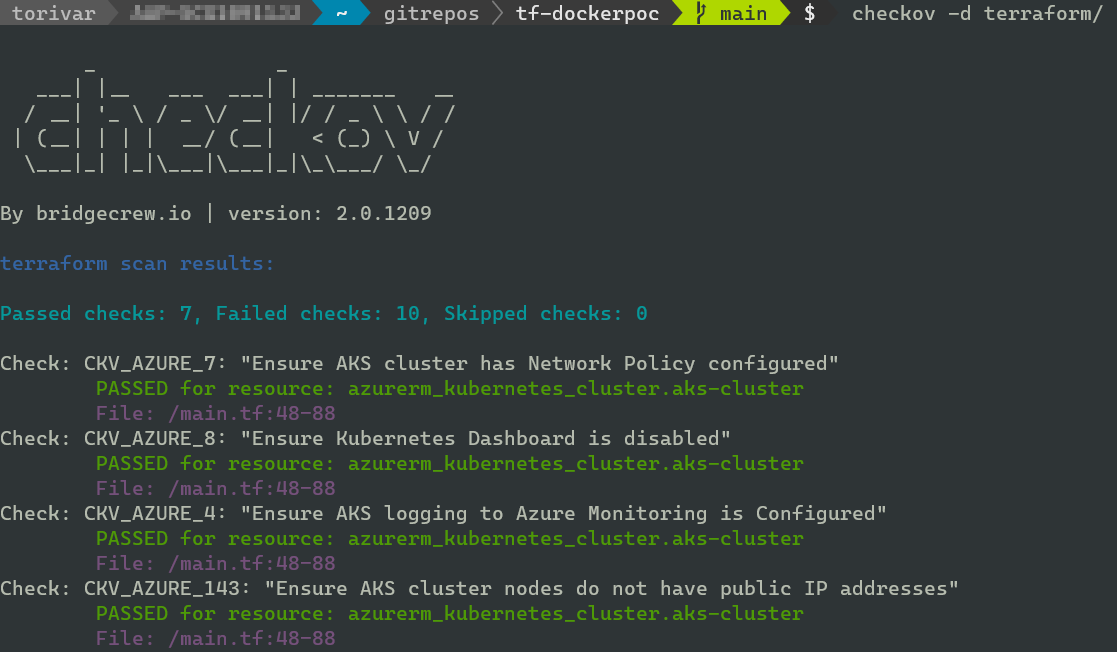
To scan, you can run checkov -d <terraform root directory> --compact. In my case this was the terraform folder from where I was standing. You can use an absolute path (show with ‘pwd’) instead of relative.
The scan will use a default compliance policy set, which you can find here for terraform. You can write custom policies, and I would recommend doing them in YAML. I think YAML will have the most agreeable authoring experience here. Though I must confess I have not written any custom policies. I just prefer YAML for this type of stuff.
If you run this with default settings, it will exit with error code 1 on failure and might stop your workflow/pipeline. To test checkov with little impact, you can use the –soft-fail switch. This will list any misconfigurations, but will not stop your workflow. You can also use –soft-fail-on to suppress specific checks failing. More CLI switches can be found here.
Analyse Terraform plan
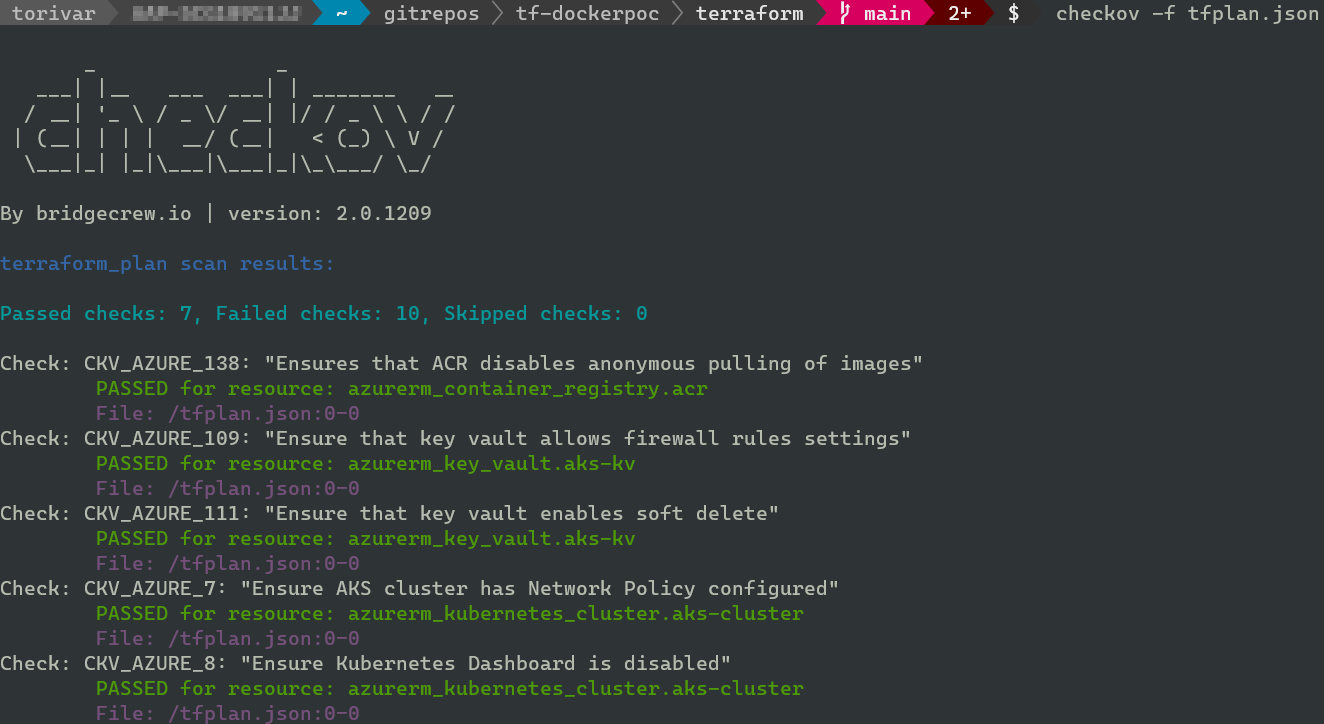
Checkov can also analyze a Terraform plan for you if it is saved as json. This is great if you want to do another check for any configurations that maybe aren’t available before the plan step has been performed.
terraform plan -out tfplan terraform show -json tfplan > tfplan.json checkov -f tfplan.json
This time it yielded the same result as performing the scan on your terraform files. Sometimes you can get different results here. This is what checkov themselves say on it:
Plan evaluation provides Checkov additional dependencies and context that can result in a more complete scan result. Since Terraform plan files may contain arguments (like secrets) that are injected dynamically, it is advised to run a plan evaluation using Checkov in a secure CI/CD pipeline setting.
Please note the tip about secrets in your plan file. This is important to be aware of.
Run in container
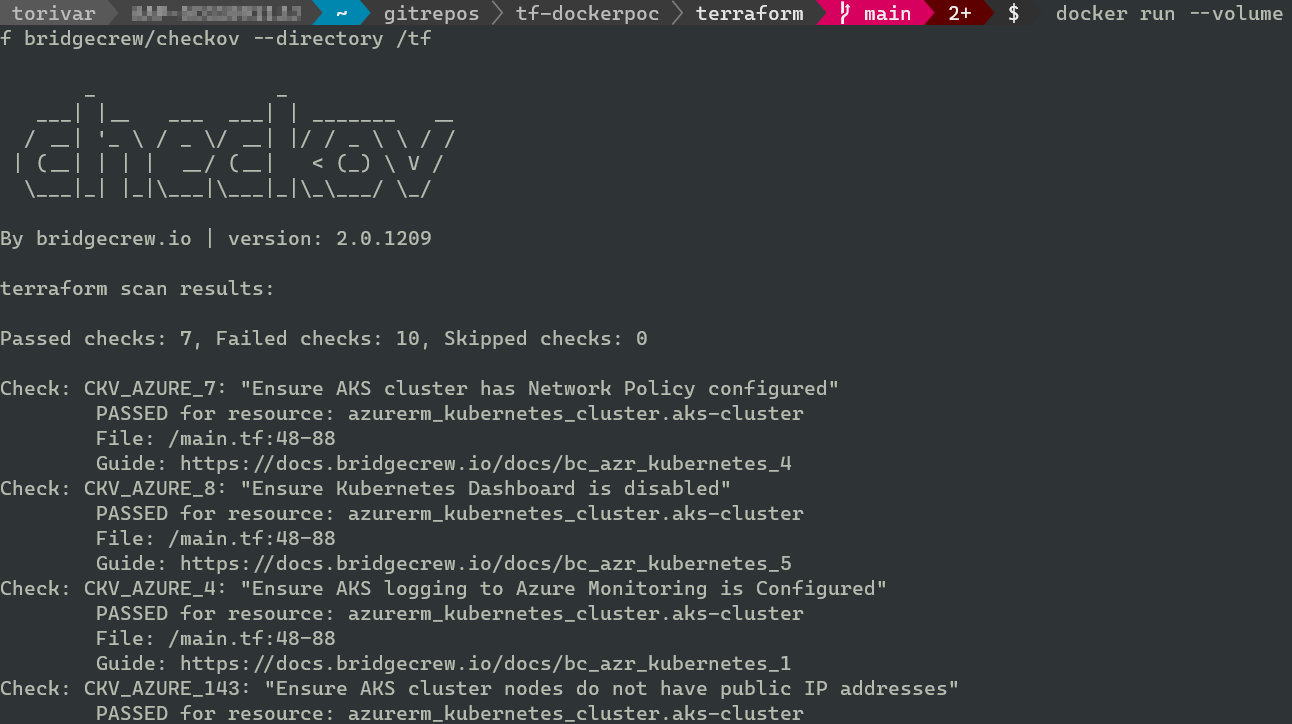
Checkov can be run from a container, and this is probably the way you would want to run it in a production setting. This way you get the same environment each time, and don’t need to bother with installing all the dependencies in your workflow. This will look a little different, but will yield mostly the same results.
Note that it is using the same version as before. Full command line:
docker run –volume “/home/username/projects/awsome-project/terraform”:/tf bridgecrew/checkov –directory /tf
Run in pre-commit stage
If you followed my previous post on using pre-commit-terraform, you maybe know that checkov is a plugin you can use with pre-commit hooks. This is how you would add it to your pre-commit-config file.
repos: #With bridgecrew
- repo: https://github.com/bridgecrewio/checkov.git
rev: ’’ # change to tag or sha
hooks:
- id: checkov
#With pre-commit-terraform from Anton Babenko
- repo: git://github.com/antonbabenko/pre-commit-terraform
rev: v1.72.1
hooks:
- id: terraform_checkov
args:
- –args=–quiet
- –args=–skip-check CKV2_AWS_8
- –args=–compact
- –args=–soft-fail
- id: terraform_checkov
args:
Run in CI/CD workflow
In addition to requiring passing pre-commit hooks on the client, you can run this in your workflow/pipeline to force adherence to company policy. It is possible to circumvent the local pre-commit with a simple flag, but this can’t be done as easy in a repository where code owners (among other security measures) is configured.
Add it running in a container like we did above. Example below with GitHub Workflow and soft-fail. It is not tested, but with some tinkering it should work.
[…]Removed for brevity jobs: checkov: runs-on: ubuntu-latest
steps:
- uses: actions/checkout@v2
  with:
    fetch-depth: 0

- run: docker run --volume "${{ env.GITHUB\_WORKSPACE }}":/tf bridgecrew/checkov --directory /tf --soft-fail
terraform: needs: checkov name: ‘Terraform’ runs-on: ubuntu-latest
steps:
  - name: Checkout
    uses: actions/checkout@v2

  - uses: hashicorp/setup-terraform@v2
    with: terraform\_version: 1.2.0

  - name: Terraform Format
    run: terraform fmt

  - name: Terraform Init
    run: terraform init

  - name: Terraform Plan and validate
    run: |
      terraform plan -out tfplan
      terraform show -json tfplan > tfplan.json
      docker run --volume "${{ env.GITHUB\_WORKSPACE }}":/tf bridgecrew/checkov -f tfplan.json --soft-fail
In summary
Pre-checking your Infrastructure code with checkov is a nice way to add some security to the earlier stages of your IaC lifecycle. This can prevent misconfigurations, and make sure contributors adhere to certain custom policies (like maybe naming standard?). Doing this can catch those pesky security risk configurations much earlier in the lifecycle, and prevent any chance of them going into your live infrastructure.
It is important to use from the start, and not patch on later. There can be many fixed necessary to get you IaC “officially” compliant. Not all the tests are relevant for everyone, but then you can skip checks.
