Exploring the basics - Customize PowerShell prompt
TL;DR
Install oh-my-posh with winget. Set config in PS Profile. Prompt looks good!
Background
I did a previous post on this customization, but since then things have changed. Oh-my-PoSh has been updated, and is now possible to install via winget! This is the preferred option, as it will allow better update experience than the previous ways.
Since the post has aged a bit, I will update the information in this post, and maybe spread the word to even more people on the brilliant Oh-my-PoSh from Jandedobbeleer.
Installation
When I installed Oh-my-posh previously, I used the manual approach:
Set-ExecutionPolicy Bypass -Scope Process -Force; Invoke-Expression ((New-Object System.Net.WebClient).DownloadString('https://ohmyposh.dev/install.ps1'))
This was fine, and worked OK. Not the best way to keep something updated, and not the most intuitive way of installing. You need to check the install script and make sure there are no unwanted changes or data exfiltration. This is not officially provided by Microsoft, and so it might be good to check on what the script does. Anyway, there is now a new method for installing: winget.
The command to install from elevated PowerShell prompt:
winget install JanDeDobbeleer.OhMyPosh -s winget
If you want git-related information in the prompt also, you need a few more tools:
Also good to have parallell to the Oh-my-Posh is PSReadline and AzPredictor, but these are not required.
Required fonts
Install the font
The weird symbols and nice “graphics” in prompts are provided by something called “glyphs” or “powerline glyphs”, and these require a use of specially crafted fonts. Luckily Nerdfonts provide us with the proper fonts, and we can just download from here. I have been using “Cascaydia Cove NF” for a while, and this works great. Some intermittent issues with PowerShell prompt, but it looks good most of the time.
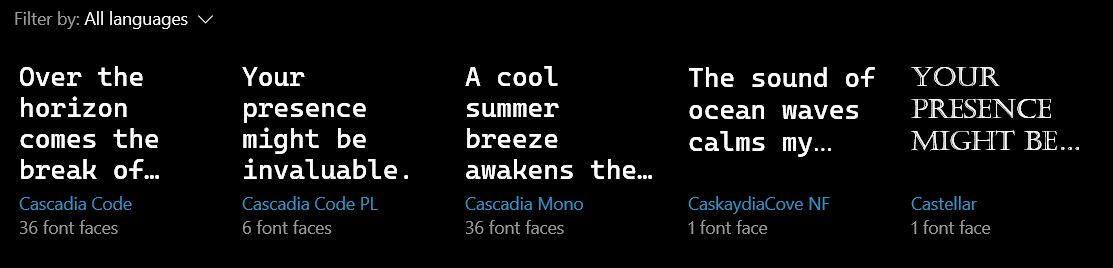
I also have a few others installed Cascadia Code, Cascadia Code PL (which stands for PowerLine), and Cascadia Mono. Sometimes I switch between them, but mostly I use the Caskaydia Cove. Another font that looks good, and is recommended by the creator of Oh-my-Posh, is Meslo. Choose the font that suits you. That’s what I have done.
You can right click the font file and install for all users. I recommend installing for all users, as this can prevent issues with some programs.
Configure font in PowerShell
Run PowerShell as administrator. Right click the window bar, and choose “Properties”.
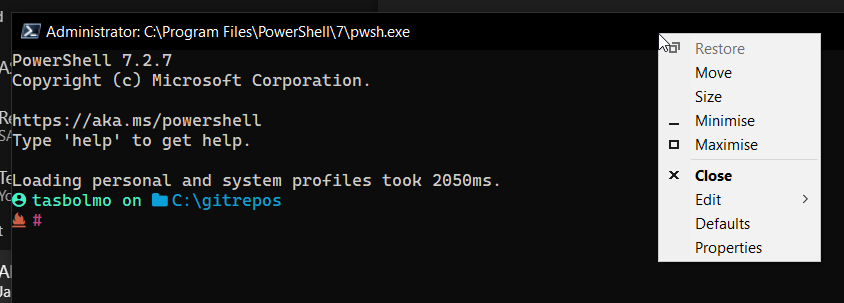
Choose the font you installed. In my case it is “CaskaydiaCove NF”.

Configure font in Windows Terminal
Windows Terminal is a nifty little tool for consolidating your prompts. I use it all the time, and especially when switching between WSL2 and PowerShell. Configuring this has become much easier than it was in the early days. You needed to manually edit a settings json file. This is now GUI-based.
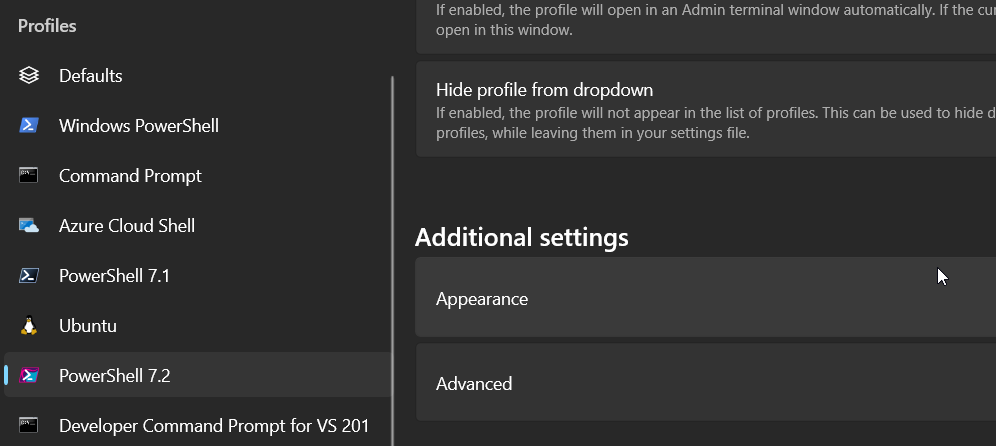
Open Windows Terminal. Choose “Settings” in the dropdown menu from tab line.
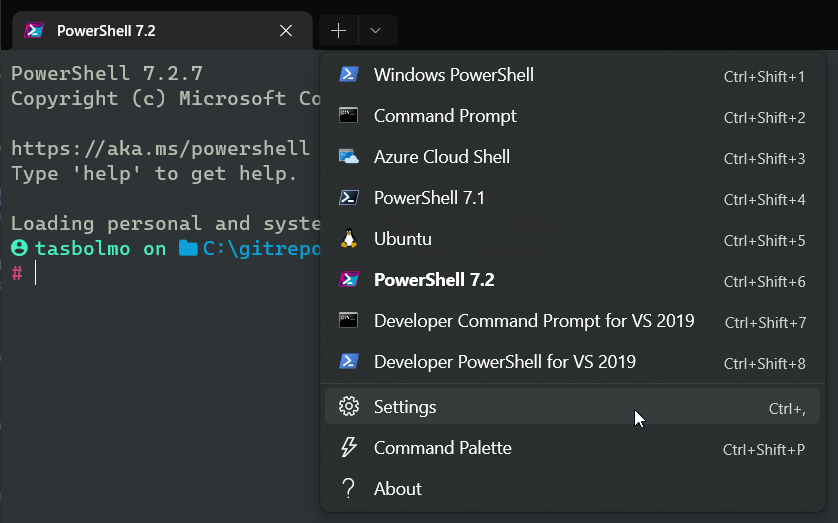
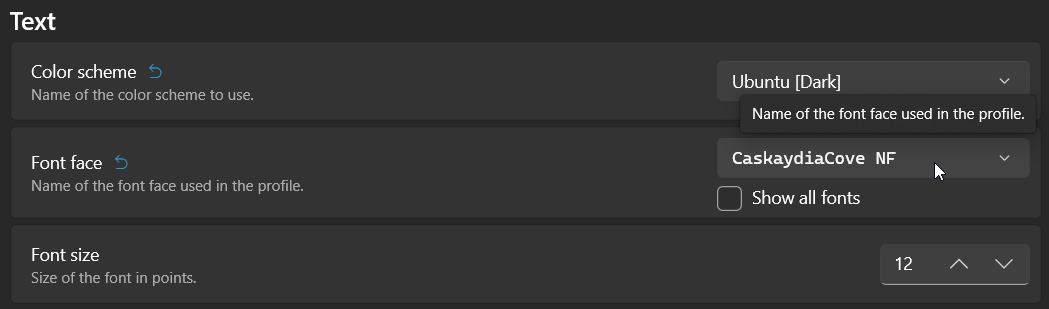
Choose your PowerShell profile under profiles, and Appearance. Set your font in “Text” sction.
Configure font in VSCode terminal
Visual Studio Code is my IDE of choice for everything at the moment. I write Terraform, Markdown, Bicep, ARM, PowerShell, ++ here. This blog post is written in VSCode. The font needs to be configured here also, but this is a somewhat simple affair.
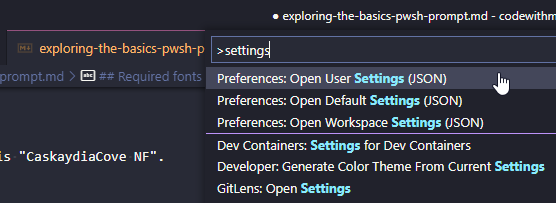
Open VSCode. Open the command palette (Ctrl+Shift+P) Type “settings”, and choose Open User Settings (JSON)
Just replace CaskaydiaCove NF with your chosen font name.

This needs to be the exact same name as in windows font settings. If you are having issues, make sure this is set to your actual font name.
If you haven’t edited your settings.json before, this might be a new experience. There should be all kinds of settings there. These are the settings you can manage from the GUI in VSCode. You can also set this directly in your VSCode preferences, but I have gotten used to editing the settings.json.
While we are on the subject, I would very much recommend enabling Settings Sync. This enables synchronization of your settings via your GitHub account to other VSCode instances you might be using. Great for getting all the same extensions and settings everywhere.
Test themes
Test different themes, and find the one that suits you. I chose Paradox in the past, but now I have moved on to a customized version of Amro. You can browse examples of all the themes here.
Customize theme
You might find a theme that almost fulfills your needs, but not quite all the way. This is where customization comes in handy! The theme files are pretty basic json files, and you can easily export them to modify as much as you like.
Load the theme you want, here examplified by Amro.
oh-my-posh init pwsh --config "$env:POSH_THEMES_PATH/amro.omp.json" | Invoke-Expression
Export to a different file, because if Oh-my-posh updates the themes might be updated. Any changes made to the builtin themes will be overwritten.
oh-my-posh config export --output "$env:POSH_THEMES_PATH/<your theme name>.omp.json"
Make changes to your new theme file. I wanted to keep the git status (ahead main, behind main, or both) info in my prompt which was available in Paradox, so I looked at the previous theme and copied some code from there.

Test the changes to make sure it works like you want, and make permanent by updating your PS profile.
Add to PS Profile
When you want to run Oh-my-Posh whenever you start PowerShell, you add it to your PowerShell profile. There is more to the profile than I thought, and this was a nice refresher for me on what it means. Basically this is run every time you start PowerShell, and don’t provide the “-NoProfile” parameter to pwsh.exe.
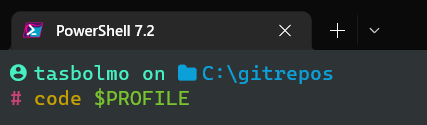
If you have VSCode installed, you can easily open your profile directly from PowerShell.
I added these lines to my profile for AzPredictor, PSReadline, and Oh-my-posh:
oh-my-posh init pwsh --config "$env:POSH_THEMES_PATH\torivar.omp.json" | Invoke-Expression
Enable-AzPredictor
Set-PSReadLineOption -PredictionSource HistoryAndPlugin -PredictionViewStyle InlineView
You might notice the “-PredictionViewStyle InlineView”. This instructs PSReadline to suggest predictions inline instead of in a listview. Previously I used the listview, but has since changed to inline. For changing rapidly between them you can just press “F2” on your keyboard. This was recently shared with me by a colleague. What would I have done without tips and tricks from others?
In addition to this, I have made PowerShell start on my root GitHub repos folder, because that’s mostly where I rummage around and do my work. I got tired of always navigating away from the users folder when starting PowerShell.
After updating your profile, you need to reload it. Either restart your PowerShell window, or you can do it with this command.
. $PROFILE
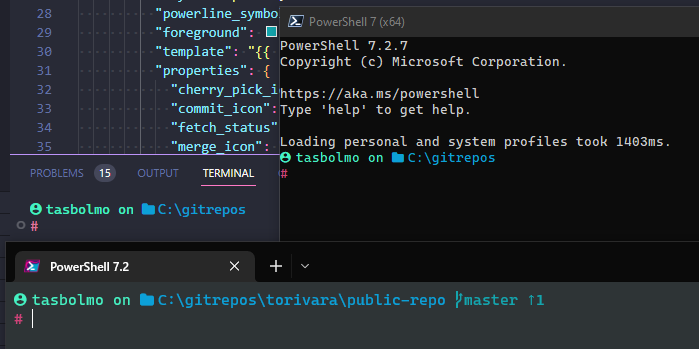
If using VSCode with PowerShell terminal, you will also get the nice looking prompt there.
In summary
If you followed this post, you now have a sweet new pimped PowerShell prompt! You can also do this for other prompts, but I mostly use PowerShell anyway. My previous post also covered WSL, but it’s not as relevant for me atm. Maybe another time.
Keep following, and keep watching this space for more tips and tricks regarding Azure, PowerShell, and IaC!