Securing your workflows with managed identities
TL;DR
Use different managed identities with different levels of permissions for your workflows. Limit damage if someone gets access, and prevent unintended consequences.
Disclaimer: I know Azure AD has been renamed to Entra ID, but I can’t bring myself to use that name. I will continue to use Azure AD, at least for this post. 🤠
Service principals for workflows
To authenticate from a workflow to Azure you historically would use a service principal (SPN). An SPN is like a user account in Azure AD, and it can have client secrets. Think of it as a service account that is not associated to a single person in your org. It is a non-personal user account that can be assigned permissions on Azure resources.
When you create an SPN you typically generate a client secret for authentication. The SPN client id (app id) combined with the client secret is then used for authenticating to Azure. Methods include manually with az cli and an azure-login action in GitHub. Therefore the client id and client secret must be treated as sensitive values. They are like having a username and password. If someone gets access to these values they can do whatever the SPN has permissions to do.
# Azure CLI login
az login --service-principal --username $SPN_CLIENT_ID --password $SPN_CLIENT_SECRET --tenant $AAD_TENANT_ID

# PowerShell login
$SecurePassword = ConvertTo-SecureString -String "Password123!" -AsPlainText -Force
$TenantId = 'yyyyyyyy-yyyy-yyyy-yyyy-yyyyyyy'
$ApplicationId = 'zzzzzzzz-zzzz-zzzz-zzzz-zzzzzzzz'
$Credential = New-Object -TypeName System.Management.Automation.PSCredential -ArgumentList $ApplicationId, $SecurePassword
Connect-AzAccount -ServicePrincipal -TenantId $TenantId -Credential $Credential
note: Logging in with a service principal in Azure CLI and Azure PowerShell.
This paragraph shows how you can authenticate to Azure from GitHub with a service principal secret. Where there is a client secret, there is a possibility of someone stealing it or losing it. You also have to go through the trouble of rotating the client secret preferrably every 90 days, or on compromise (which you can’t possibly know about). Enter managed identities!
Security issue
In the previous post I created a service principal, and created several federated credentials on that single SPN. Meaning the entire workflow has elevated permissions, which could potentially pose a security risk. Someone with write access on the workflow files can change it to perform some changes like add an apply step or add some bash for doing Azure-stuff directly. These actions would then be authenticated, and have write permissions on the environment. This could also be an unintended change, but would cause problems because of unneccesary wide permissions.
I will have separate uamis (instead of SPN) for the plan and apply steps this time, and the uami for the plan step will only have read permissions on the environment.
Managed identity for workflows
Instead of going the SPN route, you should be using a managed identity for your workflows. There are several benefits to this approach:
- No need to store sensitive values in GitHub.
- No need to manage any secrets (rotation).
- No secrets to accidentally expose.
- No need for app registration role in Azure AD. UAMI is a regular Azure resource.
Currently this is best supported in GitHub workflows, but the others will get there eventually. GitLab does not give the same flexibility on claim subjects yet, but that is outside of the scope of this post.
Running your workflows with a managed identity is a great way to get rid of client secrets. The managed identity is created by you (user assigned managed identity = UAMI) and can be used by your workflows to authenticate against Azure. Every authentication happens with short lived tokens.
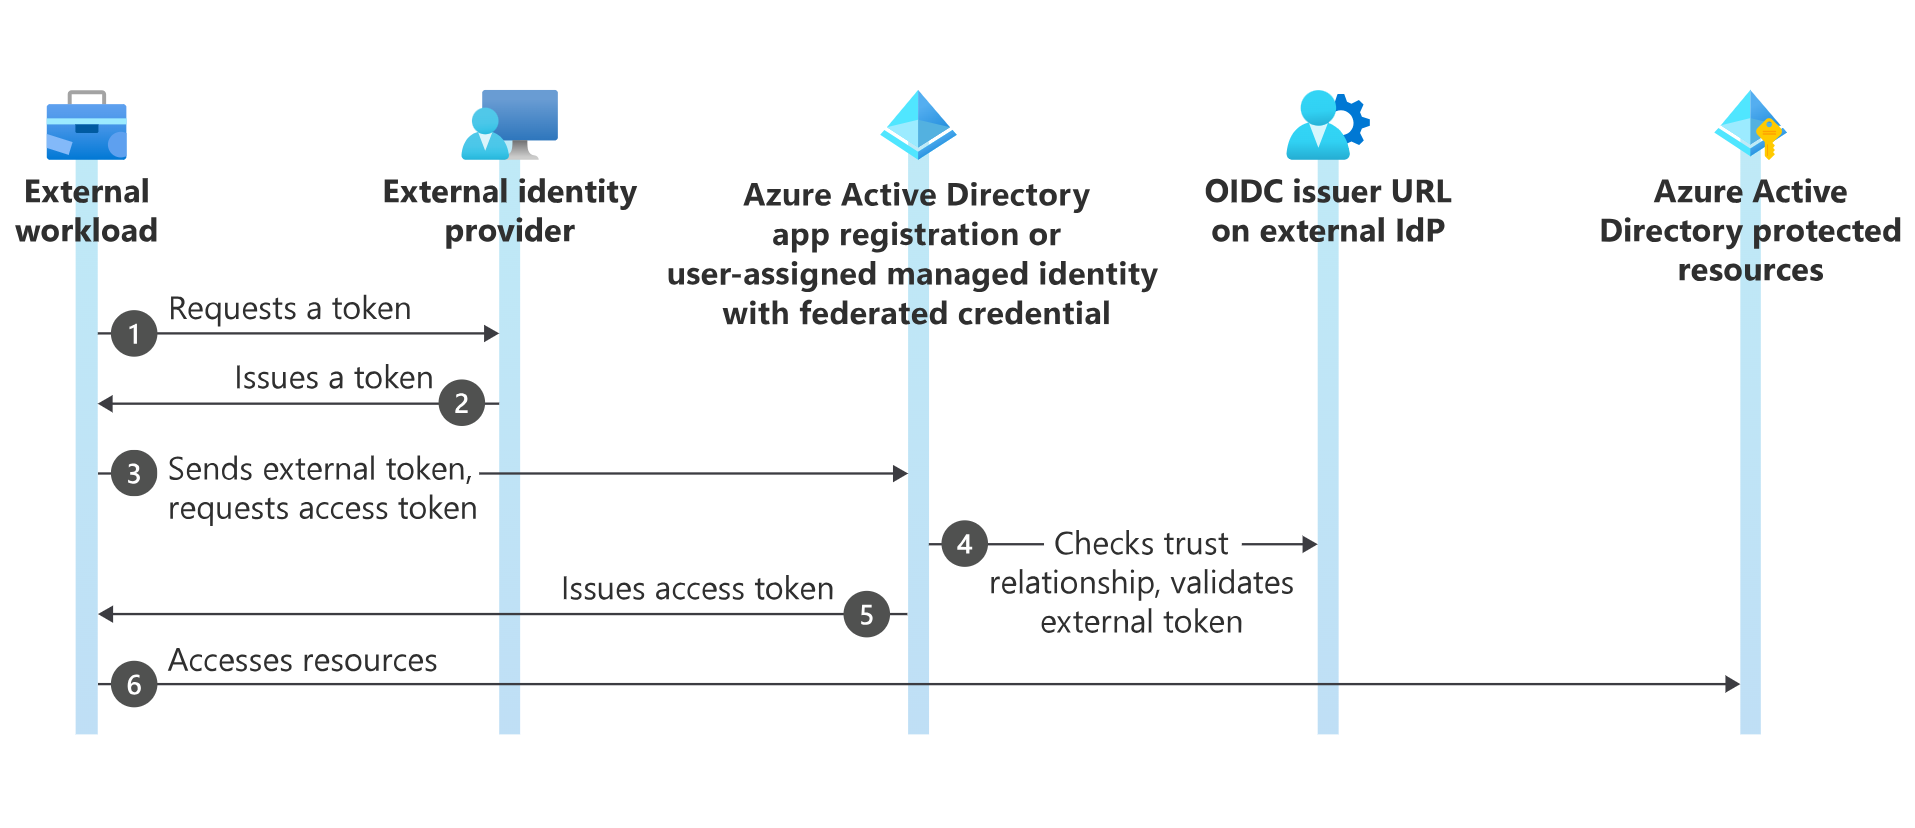
This diagram (copied from here) shows the general authentication flow of a workload requesting access token and authenticating to Azure AD:
Create the managed identities
You can create the managed identities and assign permissions with azure cli:
# Create the identities and assign permissions
$uamiReaderClientId = $(az identity create --name uami-demo-workflow-reader --resource-group terraform-oidc --location norwayeast --query clientId -o tsv)
az role assignment create --assignee $uamiReaderClientId --role "Reader" --scope "/subscriptions/<subscriptionId>"
$uamiContributorClientId = $(az identity create --name uami-demo-workflow-contributor --resource-group terraform-oidc --location norwayeast --query clientId -o tsv)
az role assignment create --assignee $uamiContributorClientId --role "Contributor" --scope "/subscriptions/<subscriptionId>"
Azure Portal guide here.
Create federated credentials
This is where the magic happens which lets your workflows authenticate to Azure AD with your managed identity. You need to create a federated credential for each entity that needs to authenticate. This can be different branches, environments, or more specific custom claims. More on custom claims in a later post if time allows. This post will focus on using the GitHub environment to our advantage.
First you need to have a public repository with two environments called test and production.
The test environment will be used for all workflow steps not requiring write access to your Azure environment. This environment will not require any approvals for “deployments”.
The production environment will be used for all workflow steps requiring write access to your Azure environment. This environment will require approvals for “deployments”.
- My organization: torivara
- My repository: oidc-starter
Create federated credentials with azure cli:
az identity federated-credential create --identity-name "uami-demo-workflow-reader" `
  --name "environment-credential" `
  --resource-group "terraform-oidc" `
  --audiences @("api://AzureADTokenExchange") `
  --issuer "https://token.actions.githubusercontent.com" `
  --subject "repo:torivara/oidc-starter:environment:test"

az identity federated-credential create --identity-name "uami-demo-workflow-contributor" `
  --name "environment-credential" `
  --resource-group "terraform-oidc" `
  --audiences @("api://AzureADTokenExchange") `
  --issuer "https://token.actions.githubusercontent.com" `
  --subject "repo:torivara/oidc-starter:environment:production"
note: I am using PowerShell, and the backtick is used for line breaks. This could be different in your environment.
Azure Portal guide here.
We are now ready to start authenticating from the workflow! 🚀
GitHub Workflow OIDC
I already covered doing this with an SPN in the aforementioned post, so I will not go into detail on the workflow itself. I will show you the changes needed to use managed identities instead of SPN. You can also read more on GitHub.
Adding environments to your repository
You need to add the environments to your repository and workflow jobs to enable authentication. Authentication requires some settings configured on the uami, and some settings in the workflow.
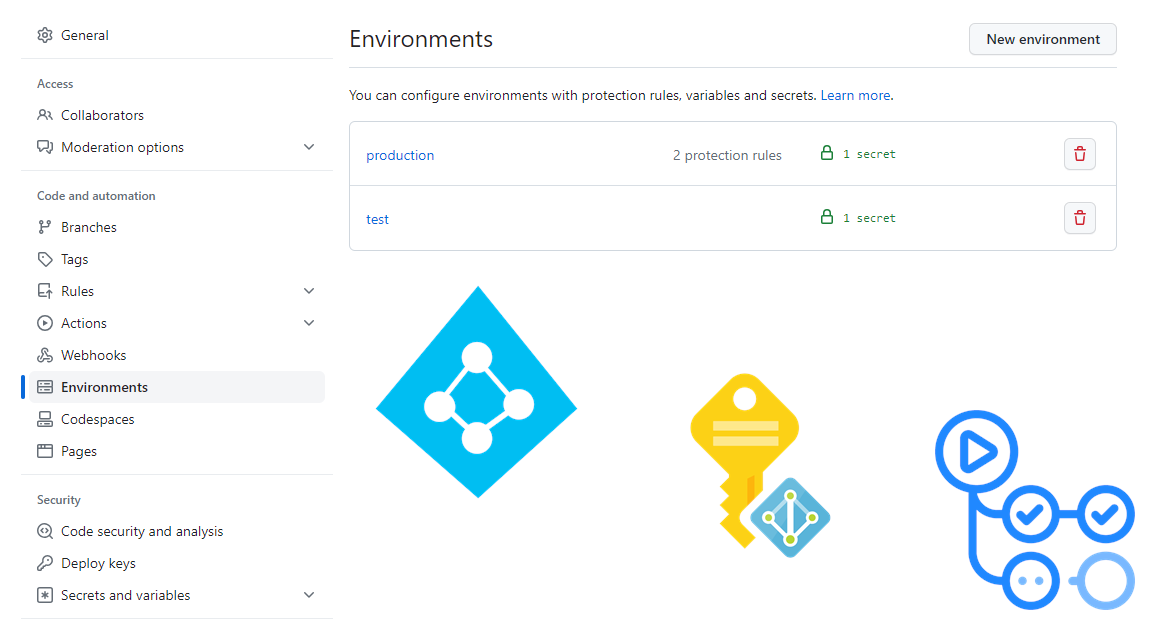
Go to your GitHub settings, and environments.
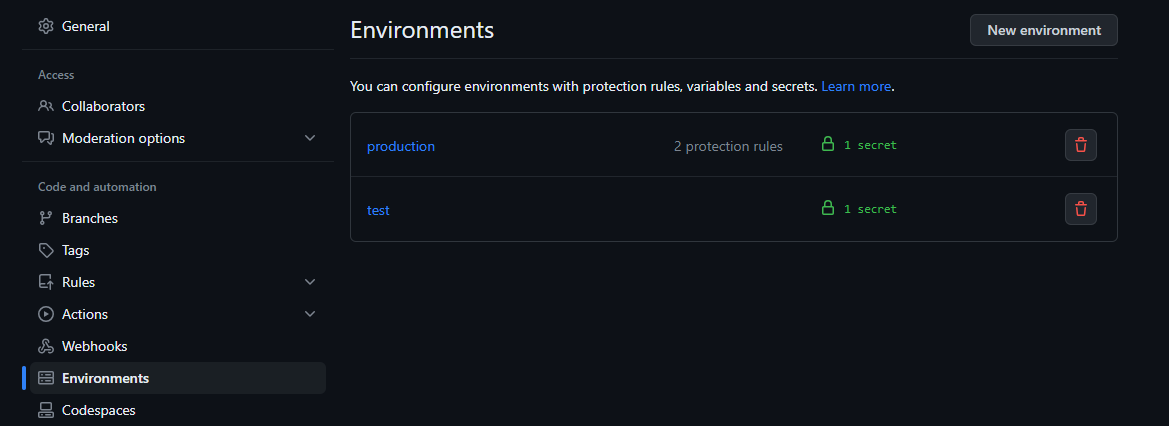
Add two environments, test and production. You can add more if you want, but I will only use these two.
Add some protection settings for the production environment. I only added an approval from myself just for sake of demonstration.
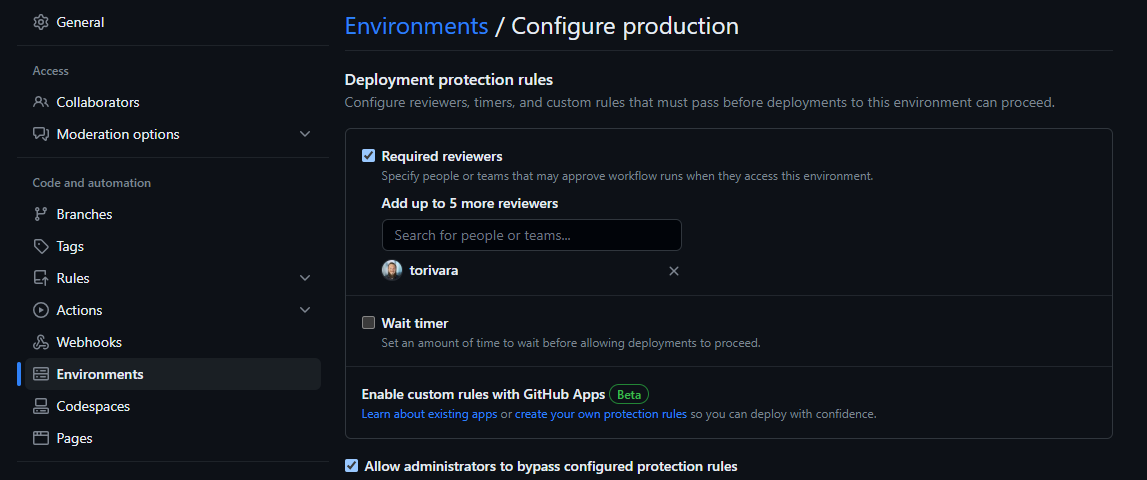
Also make sure only the main branch can deploy to production. This way no other branch can use the credentials we associate to the production environment.
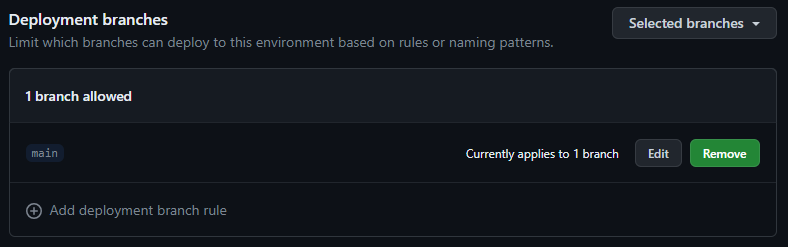
All branches can deploy to the test environment. Deployments here only have read permissions.
Adding the environments to your workflow
You need to add the environments to your workflow jobs. This is done with the environment keyword.
# Test environment
jobs:
  terraform_plan:
    name: 'Terraform'
    environment: 'test'
    runs-on: ubuntu-latest
    if: github.ref  != 'refs/heads/main'

# Production environment
jobs:
  terraform_apply:
    name: 'Terraform'
    environment: 'production'
    runs-on: ubuntu-latest
    if: github.ref == 'refs/heads/main'
The rest of the workflow file you can find here. This is a very basic example file, and is not to be used in production anywhere. It is only for demonstration purposes.
This workflow will run terraform plan on any commit to terraform files (terraform/*) to any branch in the repository except main branch. It will also run terraform apply on any commit to terraform files (terraform/*) to the main branch.
You can, and should, do more validation/security checking/linting/whatever before running terraform plan and apply. This is just a simple example!
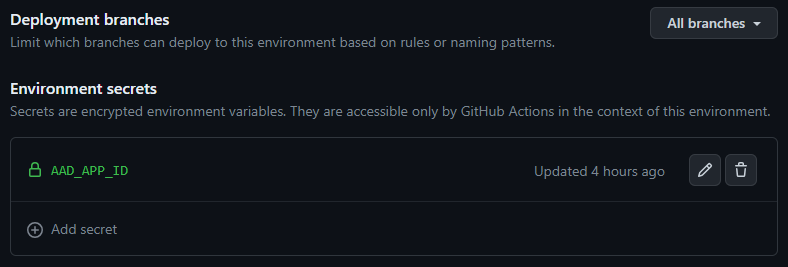
Adding environment secrets
You need to the AAD_APP_ID secret to your environments. Content = the client id from script above (uami-reader for test and uami-contributor for production). This secret, combined with the fact that it is deploying to an environment, will be used by the workflow to authenticate to Azure AD.
Adding repository secrets
I also added repository secrets for shared info between the environments:
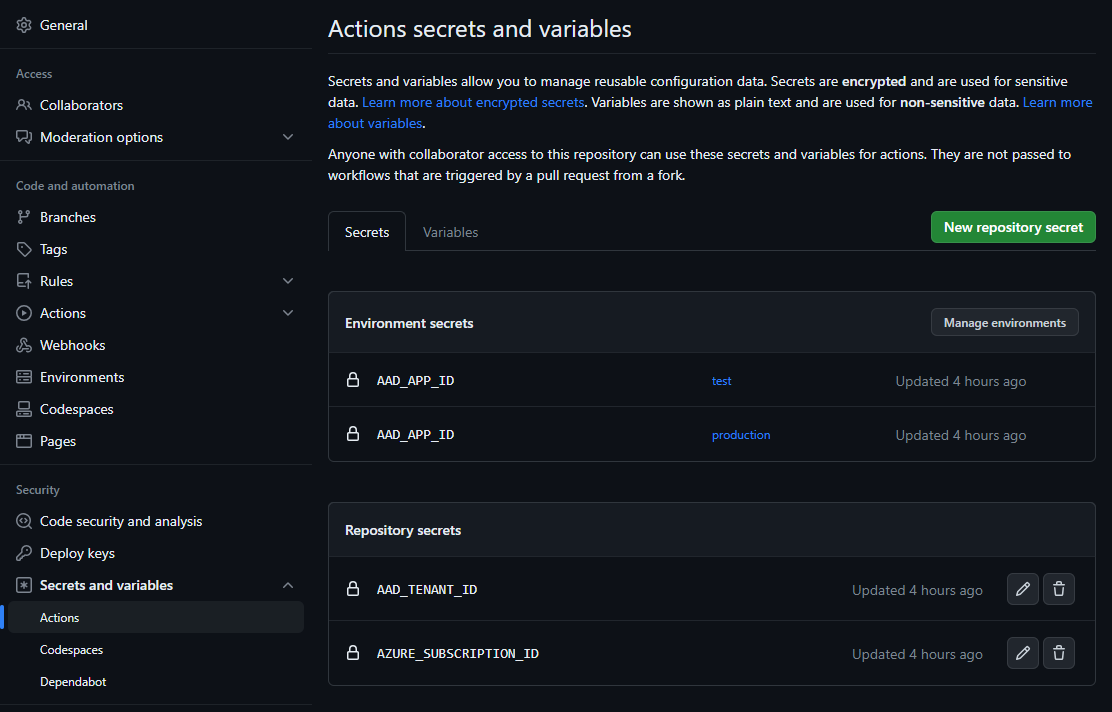
- AAD_TENANT_ID – Your Azure AD tenant ID
- AZURE_SUBSCRIPTION_ID – Your Azure subscription ID
You can find this info with az cli:
# LOGIN
az login

# TENANT ID
az az account show -o tsv --query tenantId

# SUBSCRIPTION ID
az account show -o tsv --query id
In summary
Managed identities is a great way of authenticating to Azure from GitHub workflows. It is more secure than using a service principal, and it is easier to manage. Also be aware of how anyone with access to the repository workflows can utilize the authentication for purposes other than what was intended.
Your workflows deserve the best security you can give them. Treat them right 🙂
Stay safe! 🤓